这篇文章上次修改于 2605 天前,可能其部分内容已经发生变化,如有疑问可询问作者。
Arduino IDE是官方提供的开发平台,适合开发新手,功能挺简单的,也缺乏一些效率工具比如代码提示什么的。
逛大佬们博客时看到了PlatformIO,搭配VSCode,写arduino(C++)代码别提多爽了😆
当然不止Arduino,还有stm32,8266,8051等支持
简直是MAC,Linux党的福音啊
PlatformIO也是可以在Atom中使用的,官网戳这里
在VSCode中安装PlatformIO
安装并打开VSCode
在拓展中输入并安装PlatformIO插件
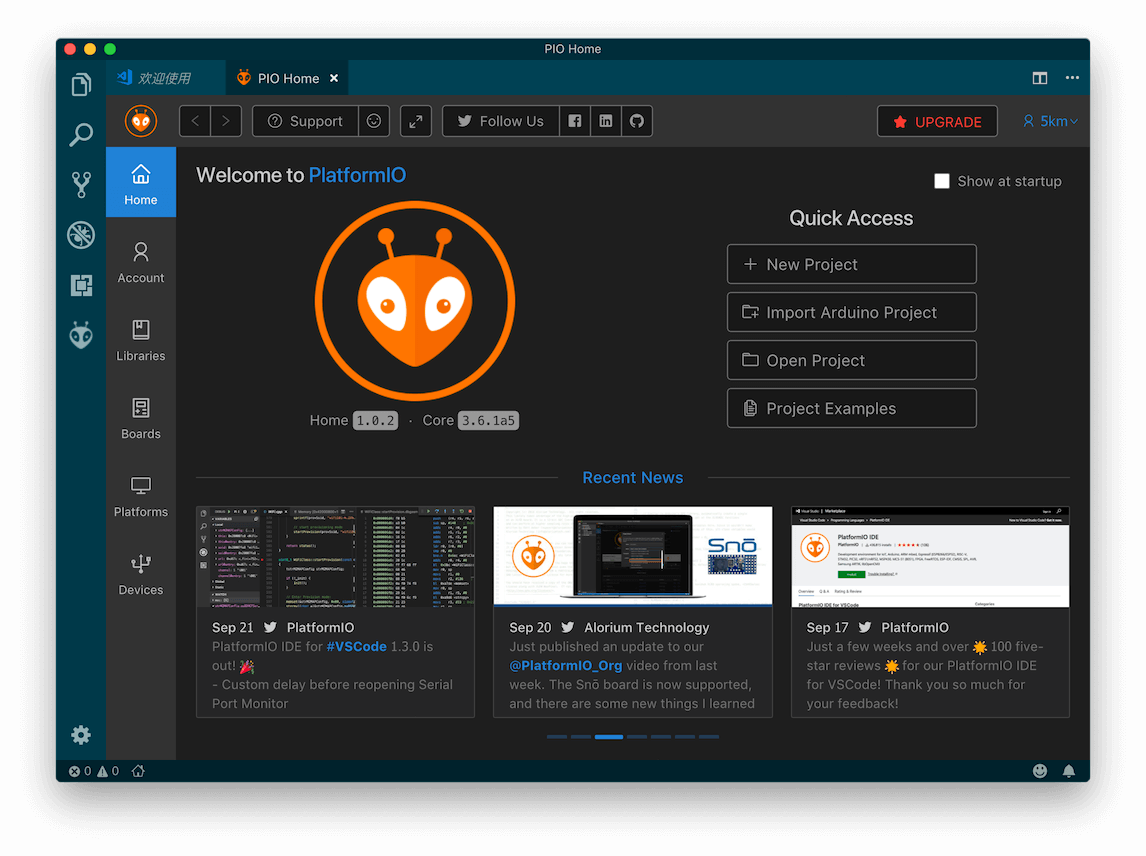
安装插件后点击重新启动,它会自动安装,耐心等待完成。

完成之后差不多就是酱紫

左侧工具栏中会出现PlatformIO logo
启动VSCode它也会跟着启动,觉得烦的话可以关掉这个
创建一个项目
在首页点击New Projects
填写对应的配置点击Finish就完成了

我选择的是Arduino Nano,非常喜欢的小板子
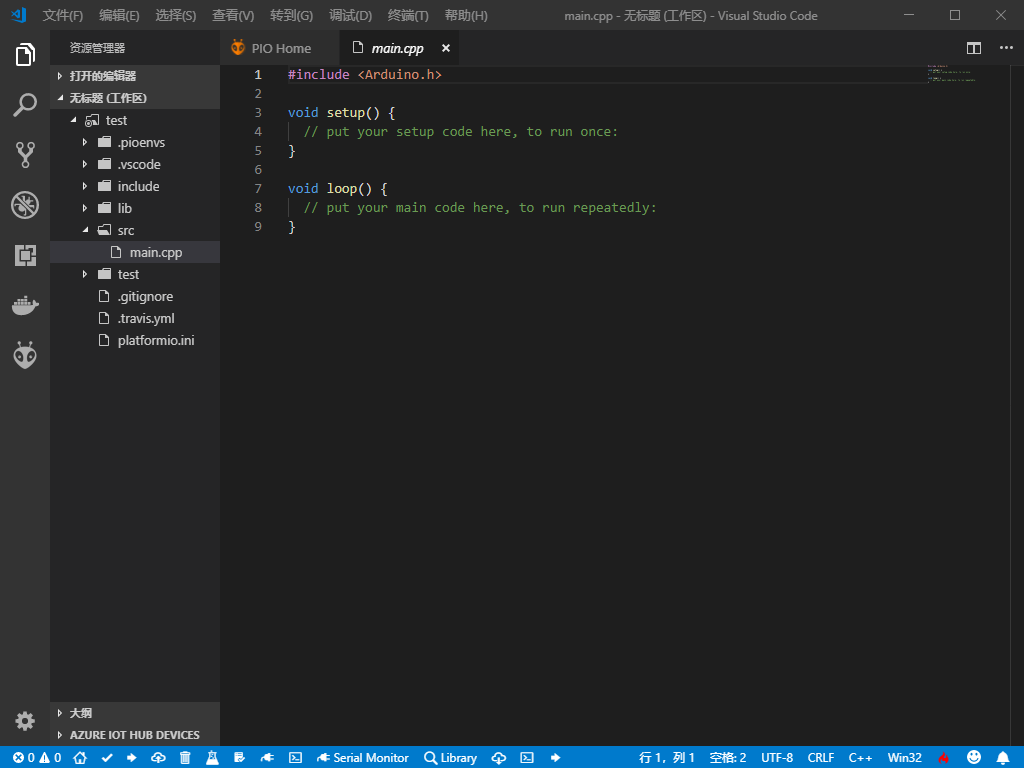
完成后就是这个样子
可以看到右侧的工作目录和底部的工具栏
目录
.pioenvs存放编译产生的中间文件和最后生成的执行文件;lib存放库文件;src存放源文件,其内部默认生成名为main.cpp的源文件;platformio.ini工程的配置文件;开发板,烧写,开发框架等
底部工具栏

- 编译按钮:小对号,点击后会编译当前激活的工程
- 烧写按钮:向右的小箭头,触发程序烧写的过程(烧录到开发板)
- 远程烧写按钮:小云朵,触发远程烧写程序的过程
- 清理按钮:小垃圾桶,用于清理编译过程生成的文件(关闭命令面板)
- 测试按钮:小烧瓶,测试工程,免费版的Platformio受限不能用;
- 运行任务按钮:小本子,会跳出操作菜单,包含编译、烧写、调试等操作;
- 串口监视器按钮:小插头,点击后会启动命令行的串口监视助手;
- 终端按钮:小命令行,点击后新建一个终端窗口;
Platformio core(pio命令)
如果你喜欢用命令行Platformio core是一个不错的选择
$ pio
Usage: pio [OPTIONS] COMMAND [ARGS]...

Options:
  --version          Show the version and exit.
  -f, --force        Force to accept any confirmation prompts.
  -c, --caller TEXT  Caller ID (service).
  -h, --help         Show this message and exit.

Commands:
  account   Manage PIO Account
  boards    Embedded Board Explorer
  ci        Continuous Integration
  debug     PIO Unified Debugger
  device    Monitor device or list existing
  home      PIO Home
  init      Initialize PlatformIO project or update existing
  lib       Library Manager
  platform  Platform Manager
  remote    PIO Remote
  run       Process project environments
  settings  Manage PlatformIO settings
  test      Local Unit Testing
  update    Update installed platforms, packages and libraries
  upgrade   Upgrade PlatformIO to the latest version
一个简单的项目
创建工程
mkdir test && cd test初始化工程
pio init
# --board uno 指定开发板
没有问题的话会生成如下文件
.
├── lib
│   └── readme.txt
├── platformio.ini
└── src
    └── main.cpp
我们可以修改platformio.ini文件,比如开发板,烧录工具,开发框架的配置
编译项目
pio run编译并上传到开发板
pio run -t upload参考文章
stm32开发新方式-platformio的IDE
开启platformio之旅
PlatformIO-code github Repositories
Docs
没有评论